When you export to the WebHelp, you might notice that the Reader UI Template you have chosen for your portal (or a specific publication) is not applied. Instead, the publication is rendered with a simplified "Legacy" UI. But you can add some of the Reader UI sidebar functionality into your WebHelp publication with the help of the Master Page feature.
Step 1. Define a few styles
Add the following CSS code to your Project Style file:
CSS |
.sidebar { |
Step 2. Create a topic with the sidebar content
In order to edit a sidebar visually in the future, we recommend that you create a separate topic that will play the role of a sidebar - we'll use this topic later.
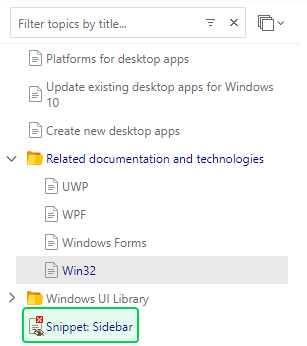
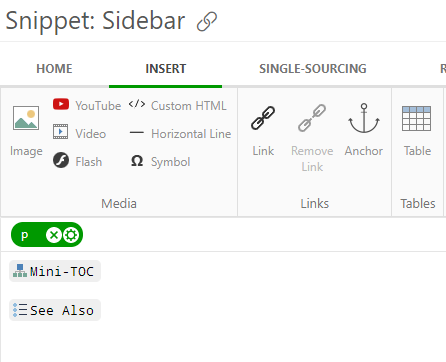
Open this topic for editing and insert a Mini-TOC in order to display the sub-headings and/or the See Also block for related topics.
Step 3. Add the sidebar topic into the Topic Master Page
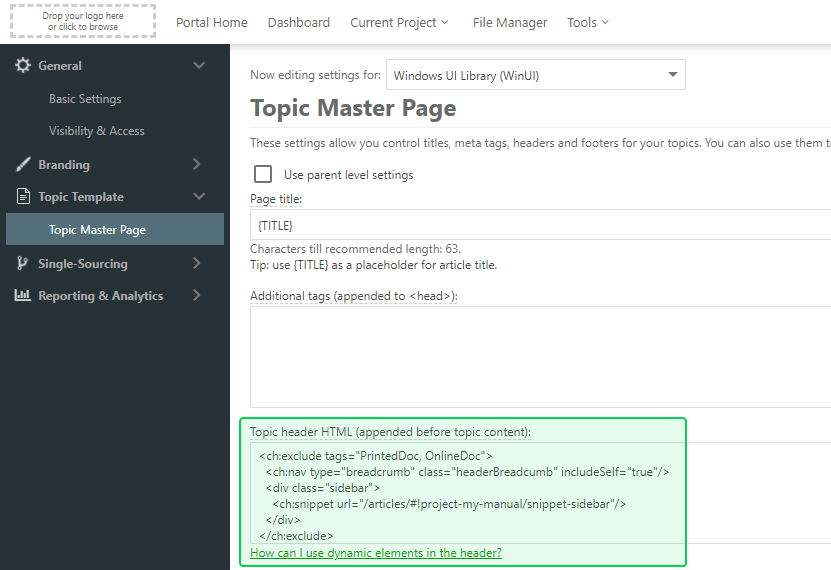
This can be either global Topic Master Page specified in the Portal Settings, or a Project TMS, specified in the Project Settings. Copy the below code to the Clipboard. You will need to change the snippet URL to a URL of a sidebar topic you've created earlier.
HTML |
<ch:exclude tags="PrintedDoc, OnlineDoc"> |
Insert the code into the Topic header HTML field of the Topic Master page settings. Don't forget to uncheck "Use parent level settings" checkbox if you're applying this to a project and not the whole portal:
This is it - after you complete the above steps, every topic of your project will have that navigation sidebar when exported to WebHelp.