Managing Additional Documentation Sites

In ClickHelp, you can have multiple Documentation Sites. This article explains how to add, configure, and disable sites in a ClickHelp portal.

Adding a Site

To add a new site to your portal:

  1. Go to Settings → Site management.
  2. Click Add Site.
    The Add site option in the portal settings.
  3. Enter a name for the site and specify its domain. Note that:
    1. The site name is an internal identifier and will not be visible to readers.
    2. The CNAME record should be added to DNS beforehand as described here: Custom Domain Name for Your Portal.
  4. Click Check DNS record to start verifying the DNS record. The check may take some time. 
  5. Click Next after the check is complete.
  6. Select the type of SSL certificate at step 2:
    1. Let's Encrypt. It is a free basic certificate. If you select this option, the certificate will be issued automatically, so you won't need to do it manually. It will also be automatically updated.
    2. Custom. It is a purchased certificate with manual update. Upload the certificate in the PFX format and specify the PFX file password in the corresponding box. If the password is not required, leave the password box empty.
  7. Click Next.
  8. The next step of the wizard shows the result of the setup. If you have selected the Let's Encrypt certificate, the process of getting the certificate will start. Once the Let's Encrypt certificate is applied, we will send you an email.
  9. Click Finish.

Once created, the new site receives a one-time copy of settings from the default site. You can then customize its look & feel, custom pages, and other site-specific settings independently.

You cannot delete a site, but you can disable it. Plan your site structure before creating sites.

Configuring a Site

To configure site-specific settings:

  1. Go to a site-specific section of the portal settings you want to configure.
  2. Use the site selector that appears at the top of site-specific settings sections.
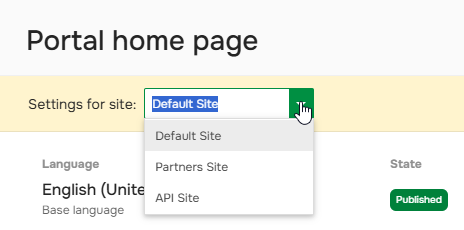
    The site selector in the site-specific settings section.
  3. Select the site you want to configure and adjust the settings.

Disabling a Site

You can disable a site only if no publications are assigned to it.

  1. Go to Settings → Site Management.
  2. Locate the site you want to disable.
  3. Click Disable site for a site you want to disable.
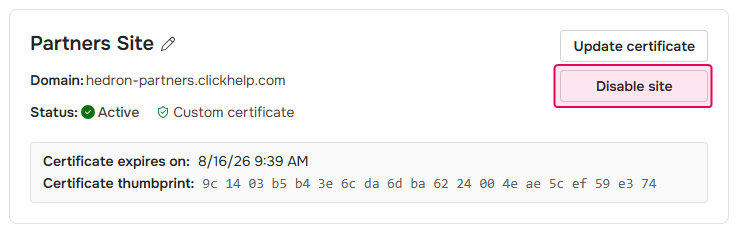
    The Disable site button.
    If the site has publications assigned, the dialog will display them. Reassign or delete all publications before proceeding.
  4. Wait for three seconds and click OK.

Sites cannot be permanently deleted from the portal settings. The disabled site will remain in the list and can be enabled later.