By default, a ClickHelp portal is available at an address like mycompany.clickhelp.co. You can replace this with a custom domain name of your choice — typically a subdomain of your company website, such as docs.my-company.com. When you finish, your portal will be available at that custom address.
| For a multi-site setup with separate domains, see Managing Sites for instructions on adding and configuring domains for each site. |
Before you begin
To successfully map a custom domain, ensure you have the following ready:
-
A CNAME record. Ask your IT department to change the DNS records through your domain registrar. You link your default portal name (e.g., mycompany.clickhelp.co) with your own custom domain name by creating a special CNAME record. Here is an example of how it looks in Namecheap, one of the popular domain name registrars:
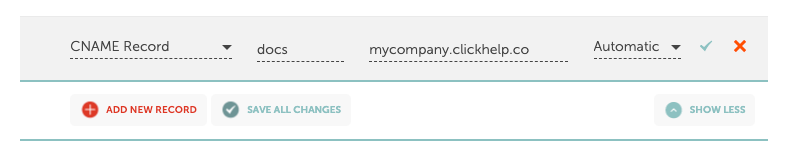
The DNS records may take several hours to be applied on your domain registrar's side. The older records can be cached in your network making the update time even longer - you can reboot your Internet proxy or router device to make it update its DNS records. - A custom SSL certificate. If you plan to use a custom certificate rather than the built-in free option, have your certificate ready in PFX format along with its password.
Map Custom Domain
|
Applying a custom domain name to a portal does not cause downtime. However, after doing so, all your users will have to log in to the portal again. |
To change the domain name:
- Go to Settings.
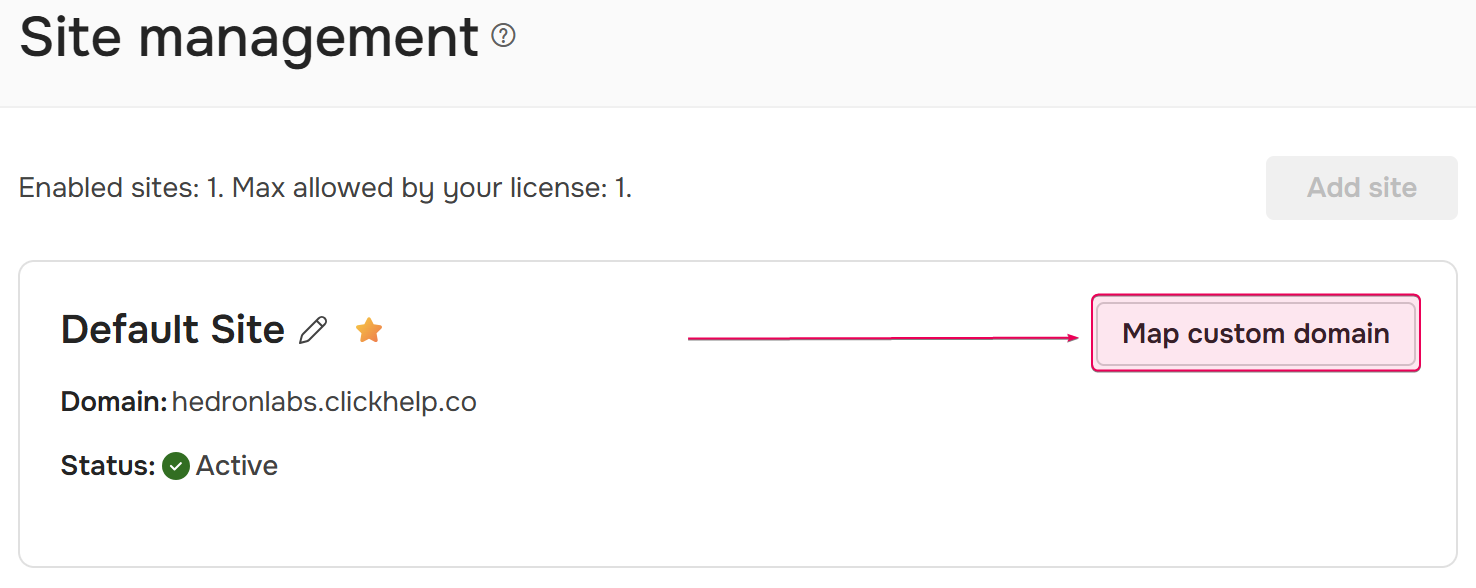
- In the left navigation panel, click Administration → Site management. This opens the Site management page, where you can configure your custom domain.
-
Click the Map custom domain button to launch the Map custom domain wizard.
-
In step 1 of the wizard, enter the Name and the new Domain Name in the boxes provided, then click Check DNS record. After that, the check for the correct DNS record will begin. It may take some time.
The Name is an internal identifier and will not be visible to your readers. - Click Next after the check is complete.
-
At step 2, select the type of SSL certificate:
- Let's Encrypt — issued and renewed automatically.
- Custom — upload your certificate in PFX format and enter its password.
- Click Next.
- The next step of the wizard shows the result of the setup. If you have selected the Let's Encrypt certificate, the process of getting the certificate will start. Once the Let's Encrypt certificate is applied, we will send you an email.
- Click Finish.
Your portal is now available at the custom domain name.